A few steps.
A happier Mac.
Let’s get you from download to your first click.
Follow along at your own pace.
- 01DOWNLOAD → APPLICATIONS
Make Keyko at home.
Wait for Keyko.app.zip to finish downloading. Open it in Finder to unzip it, then drag Keyko.app into your Applications folder.
 Keyko.appApplications
Open Keyko from Applications so your permissions stay linked to the installed app.
- 02FIRST OPEN
Open Keyko on your Mac.
Double-click Keyko in Applications. This beta isn’t notarized yet, so macOS may block the first open. If it does, follow the steps below. If Keyko opens normally, continue to step 3.
- Open System Settings → Privacy & Security and scroll down to Security.
- Find the message naming Keyko and click Open Anyway. Authenticate if macOS asks.
- Review the alert and choose Open Anyway or Open to launch Keyko.
Only approve the Keyko app you downloaded from keyko.app. This gives Keyko an individual exception; your other macOS security settings stay in place. Apple’s explanation ↗
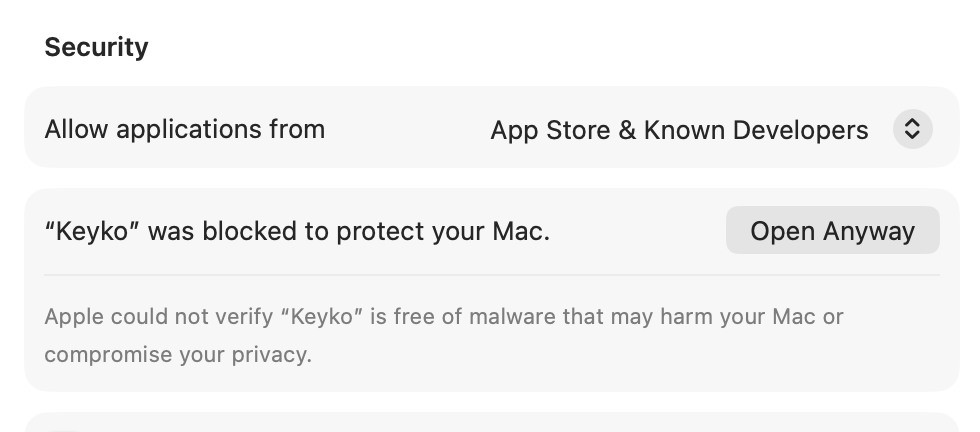
In Privacy & Security, choose Open Anyway next to Keyko. Enlarge ↗ 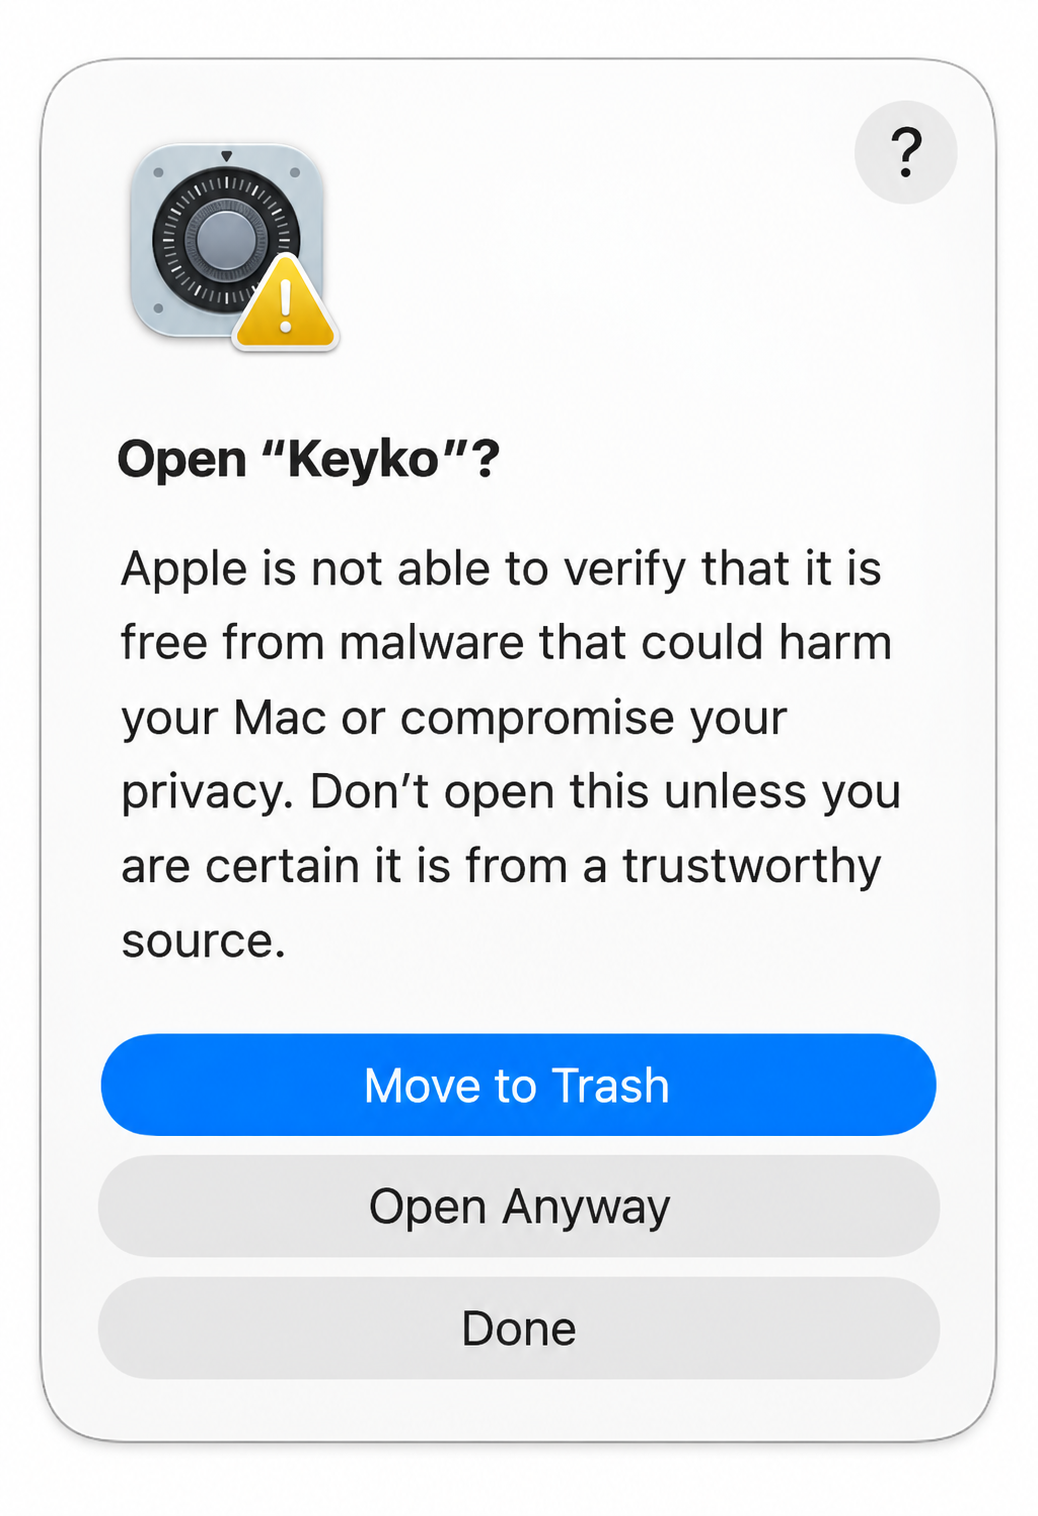
Confirm Open Anyway in the alert. Button wording can vary by macOS version. Enlarge ↗ Where is Privacy & Security?
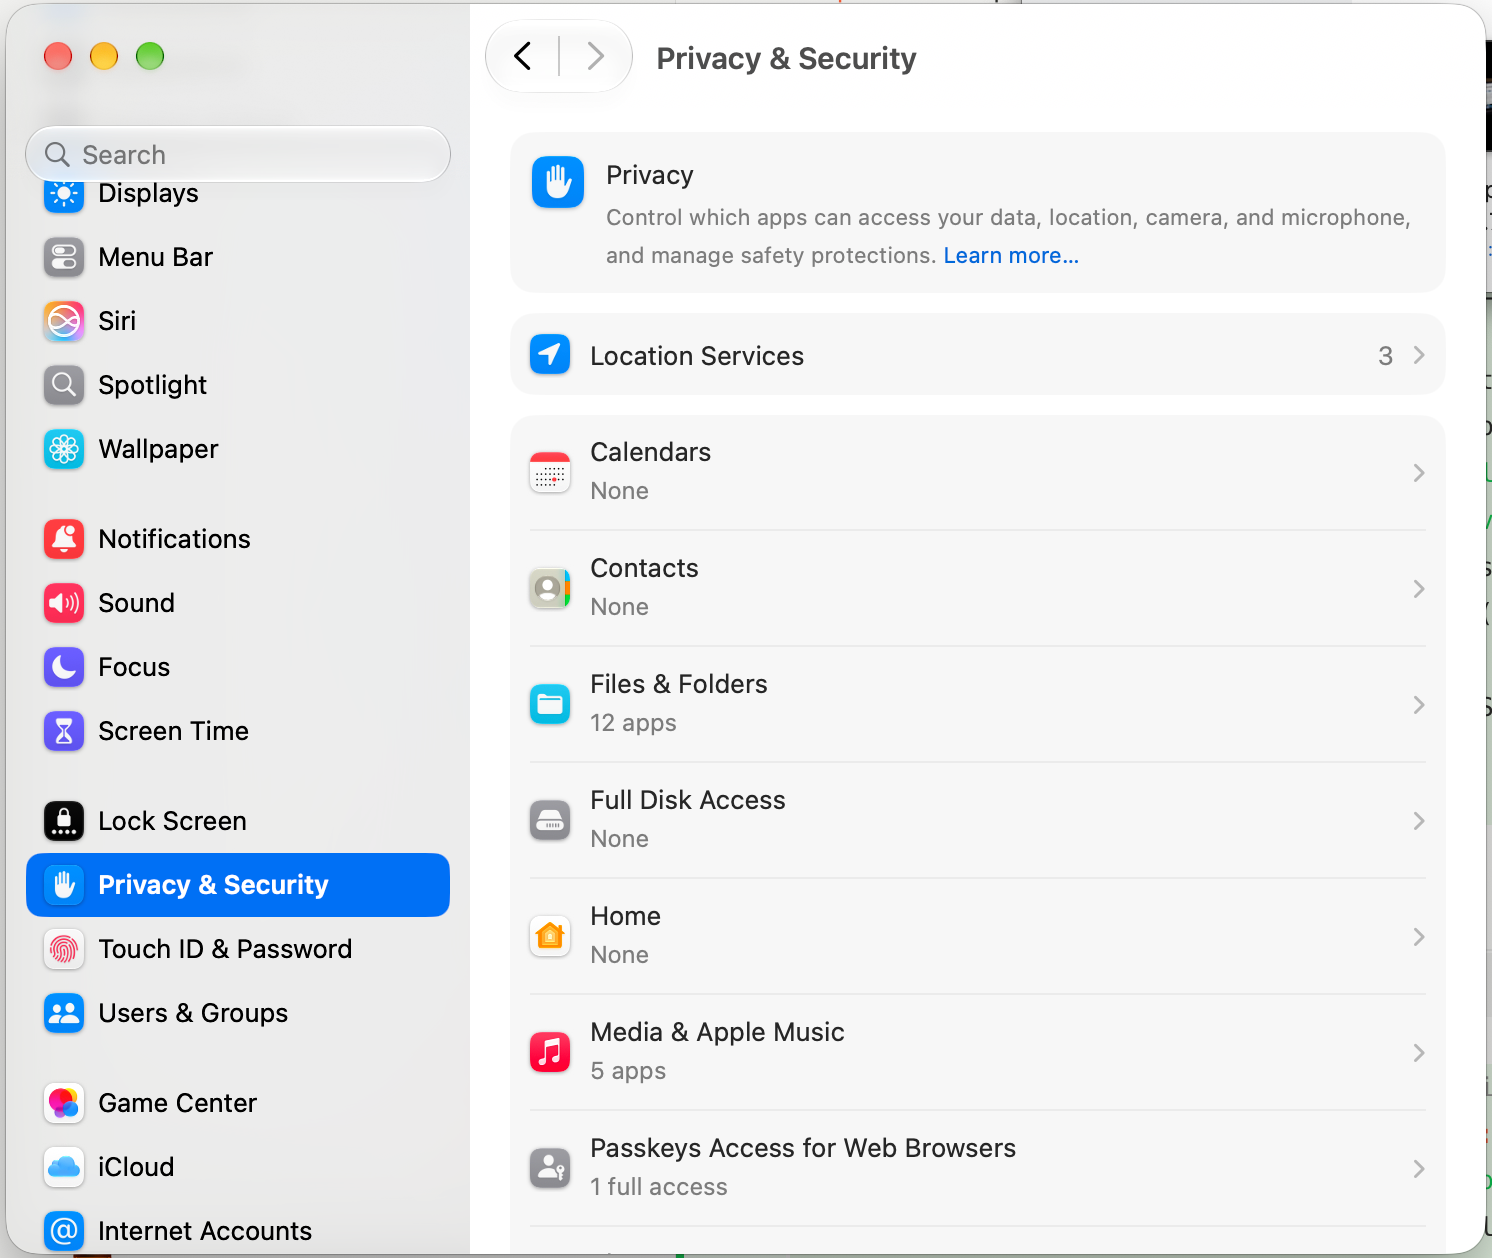
Select Privacy & Security in the System Settings sidebar, then scroll down to Security. Enlarge ↗ - 03ONE ACCOUNT, BOTH APPS
Bring your plan with you.
In Keyko’s Settings, click Sign in or restore my plan. Your browser opens the account page. Enter your email, open the magic link, then connect this Mac when asked.
Already have Plus? Use the same email as your purchase or Chrome extension. Your plan is restored without a license key. If you’re new, you can choose a Plus plan on the account page for keyboard sounds across Mac apps.
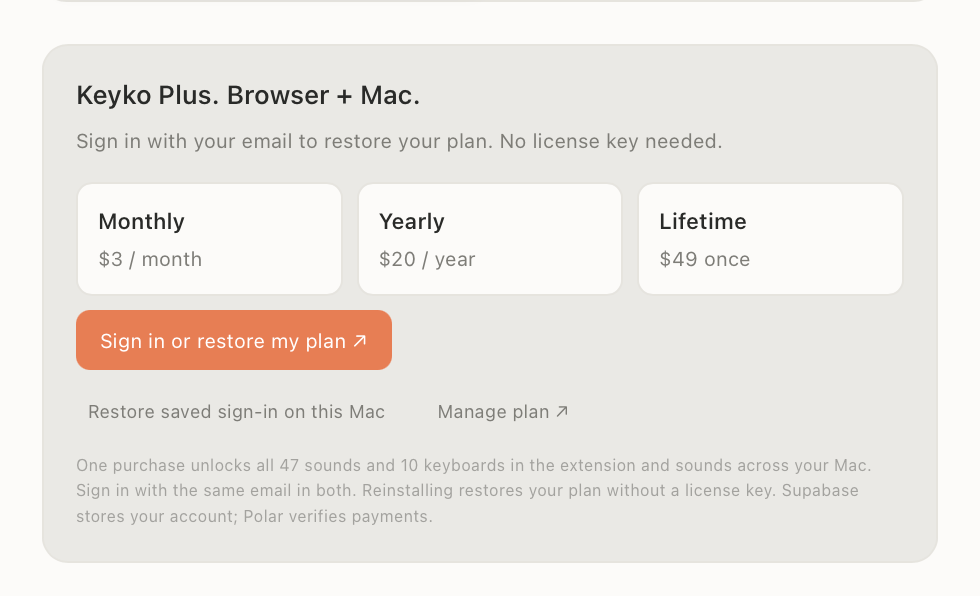
Start sign-in from the Mac app so your account can connect to this device. Enlarge ↗ After connecting, return to Keyko. If it still shows the old status, choose Restore saved sign-in on this Mac.
- 04KEYBOARD SOUNDS
Hear your first click.
Turn on Sounds everywhere in Keyko. If setup is needed, click Open keyboard permissions. This opens System Settings → Privacy & Security → Input Monitoring.
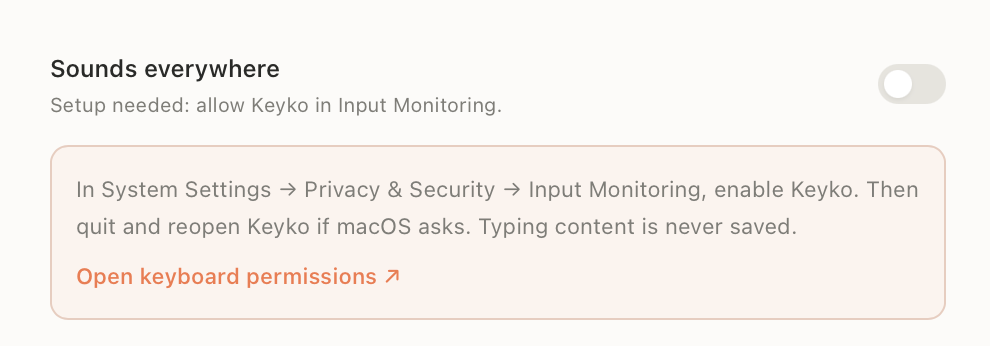
Use Open keyboard permissions in Keyko’s Settings. Enlarge ↗ - Enable Keyko in Input Monitoring.
- If the list is empty, click +, select Keyko.app from Applications, then enable it.
- Quit and reopen Keyko if macOS asks. Return to Keyko, turn on Sounds everywhere, and type in another app to try it.
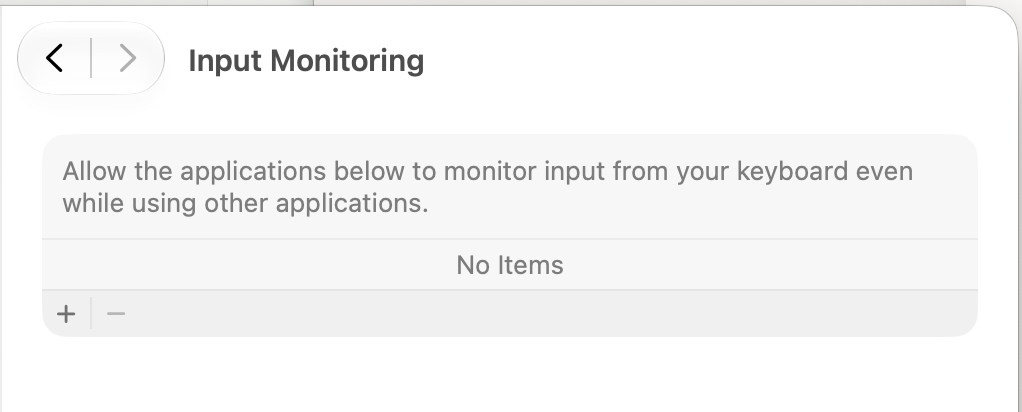
An empty list? Use + to add Keyko from Applications. Enlarge ↗ Input Monitoring lets Keyko respond to key presses in other apps. Typing content is never saved.
- 05OPTIONAL · SUPPORTED MACBOOKS
A little motion. Your way.
Open Settings → Screen Fold and turn it on. Duo is the default style. Its blur and shading follow your lid while keeping the desktop content in place.
- Click Allow Screen Recording in Keyko.
- In Privacy & Security → Screen & System Audio Recording, enable Keyko. On some macOS versions, this pane is called Screen Recording.
- If prompted, click Quit & Reopen, then return to Screen Fold in Keyko.
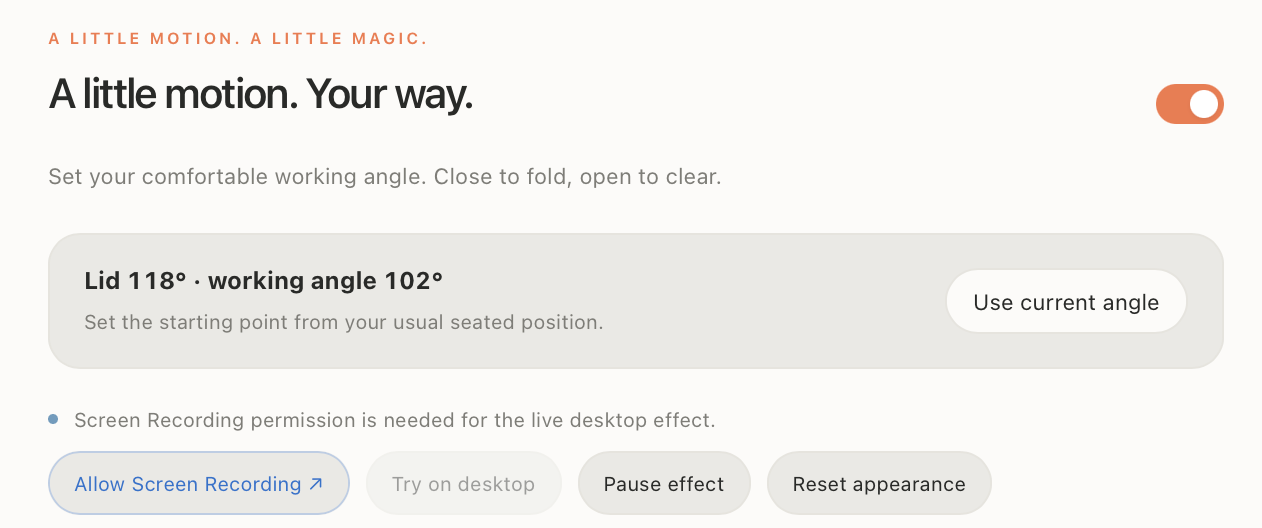
Enable Screen Fold, then choose Allow Screen Recording. Enlarge ↗ 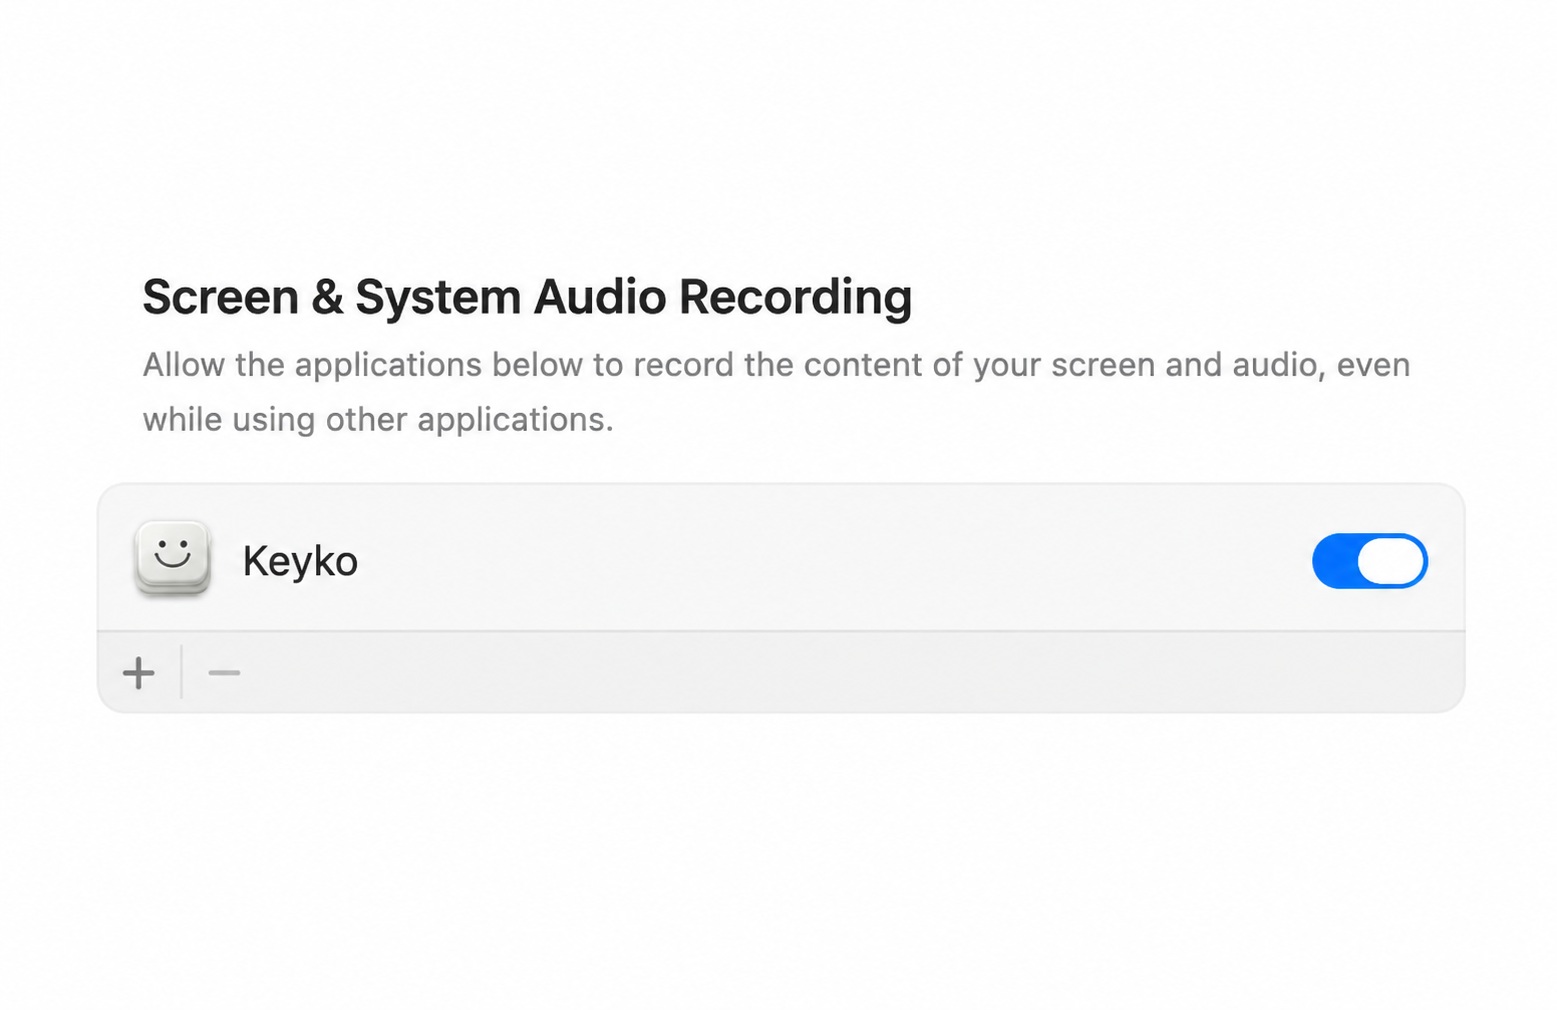
Enable Keyko in the macOS permissions list. Other apps are omitted here for clarity. Enlarge ↗ 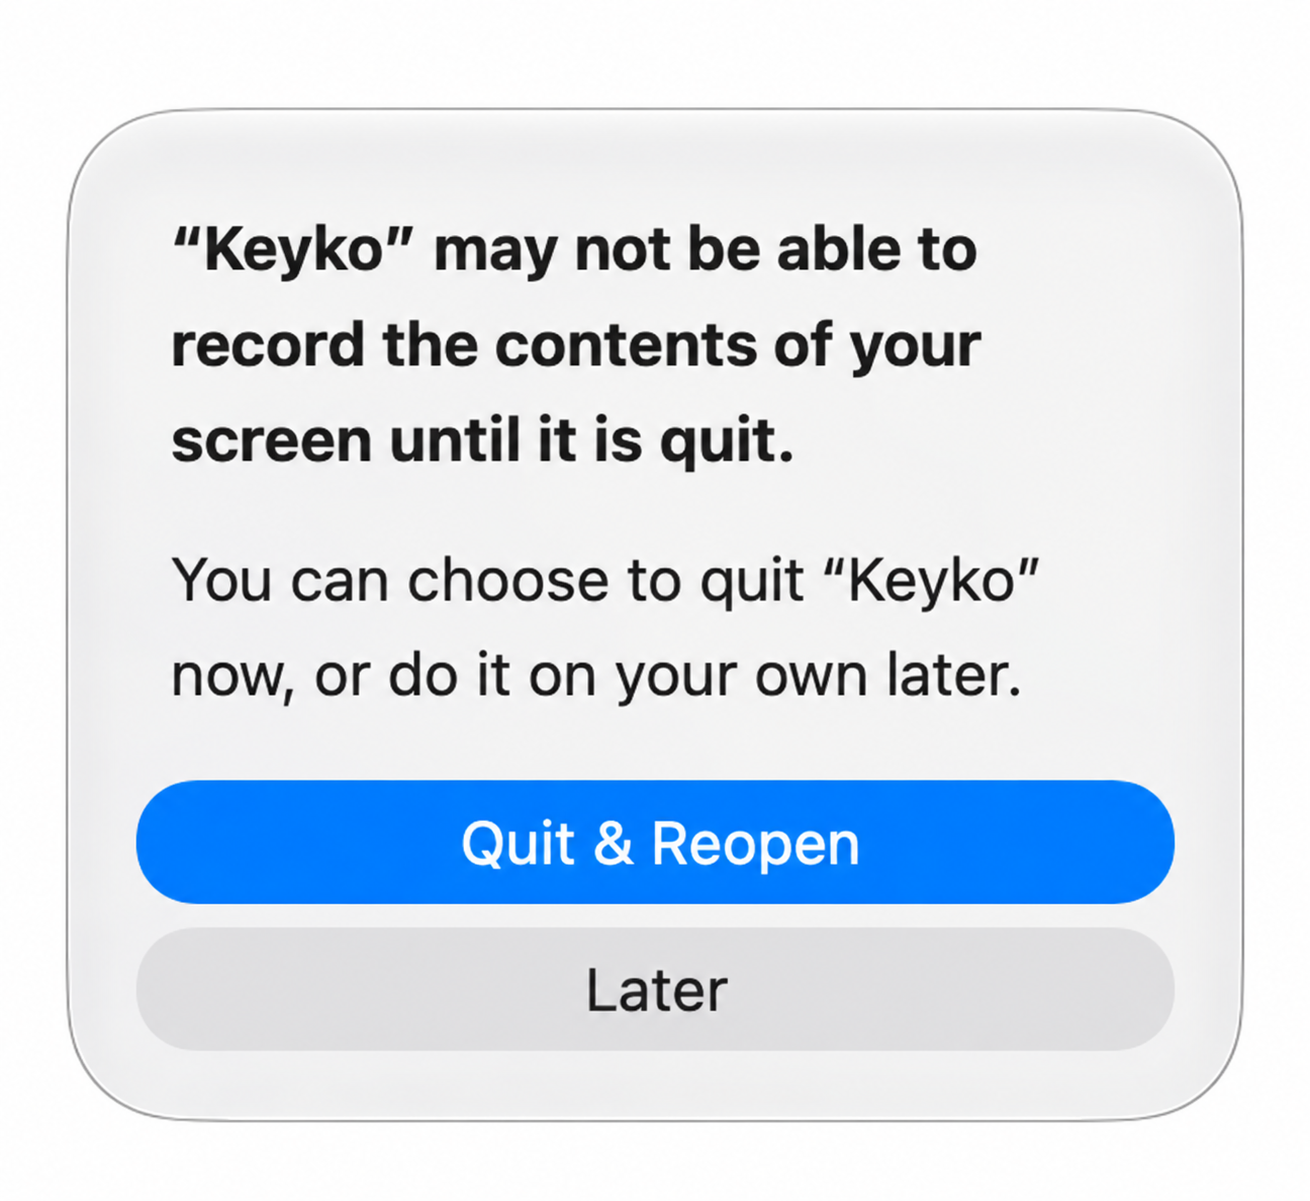
Choose Quit & Reopen if macOS asks. Enlarge ↗ With the lid at your normal working position, choose Use current angle. Try lowering it a little, then open it again. You can change the style, blur, shading and smoothness whenever you like.
Screen Fold needs a supported MacBook lid sensor. Screen frames are processed locally and aren’t saved or uploaded. Normal lid-close sleep stays the same. Press ⌃ ⌘ F to pause or resume the effect.
You’re ready to make it yours.
Pick a sound. Adjust the feel. Keep doing your thing.
A little help, if you need it.
My download didn’t start.
Check your browser’s downloads and allow the download if prompted. Try downloading again. If the service reports an error, wait a moment and retry.
I don’t see Open Anyway.
First try opening Keyko from Applications, then check Privacy & Security again. On a managed Mac, your organization may control these settings; ask your administrator.
I allowed access, but there’s still no sound.
Quit and reopen Keyko, check that Sounds everywhere is on and your Mac isn’t muted, then confirm Keyko is enabled in Input Monitoring. Check your Plus account status in Keyko’s Settings too.
Do I need Screen Recording for keyboard sounds?
No. Screen Recording is only needed for the optional live Screen Fold effect. Keyboard sounds use Input Monitoring.